A bloated and grotesque creature, the Butcher was a sadistic being that relished in the torture and pain of others. It hunted endlessly for fresh meat. Although retellings of the Darkening of Tristram describe how the Butcher was defeated deep within the Labyrinth, the horrific culling of the city in recent times, following the Dark Wanderer's wake, seems to have stirred this malevolent spirit back to evil once more.
Strategy
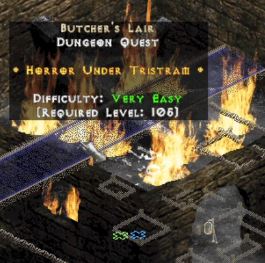
The Butcher is a strong melee fighter. His tainted cleaver hits hard and just like in the Tristram Cathedral, he will hunt you down. Upon striking you or a minion, he has a chance to incite a Bloodlust which fuels Sacrificial Shrines into emitting heavily damaging shockwaves. And to boot, he also is considerably tanky.
Required Level: 105 Keep in Inventory to Gain Bonus +10 to all Attributes 20% Magic Find +1 to Light Radius
2/7 INVASION [難易度:VERY EASY]
場所:The Storm Oasis (Act 2: Harem Level 1)
必要Lv:105
制限時間:20秒
Amongst the demonic hordes in Jerhyn's Palace a mystifying rift appeared, leading to a garden of ruins consumed by a black abyss and swallowed by sands of gold. Here a creature bearing a wicked gaze set on conquest stands vigil. It brandishes magic that pierces the air with the ferocity of thunders and that shattered Greiz's warriors as they were motes of cinder confronting a tempest. The wise Drognan believes the creature to have come from a plane further astray than even those of Angels and Demons, breaching into Sanctuary by tracing the arcane energies oozing from the forgotten Vizjerei fortress upon which Lut Gholein's foundations lie.
所持品に入れておけば効果を発揮 要求レベル: 80 最大ライフ 上昇 (11 to 15)% 最大マナ 上昇 (11 to 15)% +(6 to 15)% 、獲得経験値修正
4/7 アズモダン [難易度:HARD]
場所:忘れられし宝物庫 (クラスト北部)
The Lord of Sin walks the earth. Azmodan hits hard and emits a shield aura that grants unholy invulnerability to nearby demons. The tight confines of the temple area make it hard to get past the immortal monsters blocking your way and reach Azmodan himself. Azmodan also feasts on death, healing himself when he makes a kill.
Strategy: Try to separate Azmodan from his minions. Lure Azmodan to one side of the level and his demons to the other, then quickly run over and attack Azmodan himself.
Azmodan has a dangerous melee attack which creates a pentagram of burning hellfire. You may want to load up on fire resistance for this fight.
戦略
Azmodan does not heal if one of the regular monsters kills you. If you are a necromancer, you can disable his healing with your Void Archon’s warp field aura.
所持品に入れておけば効果を発揮 要求レベル: 100 +2 to [random skill] ([random class] Only) 全耐性 +(31 to 40)% +5% 全耐性最大値上昇 商人の売価を全て下げる 10%
アズモダンはさらに、デストラクション難易度において2%の確率でトロフィーを落とします。
ちょっとしたボーナスのために、チャームとトロフィーをキューブで合成してください
5/7 ラズマの広場 [難易度:VERY HARD]
場所:神殿の廃墟 (クラストの参道)
'My blade sings for mortal blood, and by my dark masters, it shall not be denied!'
Back in the days when Kurast was the centre of civilisation and black magic was not yet frowned upon, this was where the priests of Rathma - the necromancers - practiced their art. The place was abandoned when the religion of Zakarum took over the city and banned pagan magic, making it the perfect hiding place for an ancient evil bent on taking out the Church from within.
Primus, son of Mephisto, was the leader of the Cult of the Triune in ages past before it was destroyed and he nearly lost his life. His efforts to rebuild the Triune have been hampered by the crusaders of Zakarum, but he remains a formidable foe, doubly so in the home city of the Zakarum.
戦略
Primus himself is not particularly hard, despite his powerful ranged Bladestorm attack. The blades track your position, but do less damage than his normal attack and can be avoided, blocked and dodged.
Primus has a powerful ranged Bladestorm attack that tears minions to pieces and inflicts an unholy curse that drains your life away. The curse cannot be negated or resisted in any way.
Primus is guarded by an army of Gore Crawlers, which after several millennia in and around Rathma Square can raise themselves from the dead. Shattering the corpse does not make any difference, but the resurrections takes 10 seconds, during which you can attempt to run away and ditch them.
所持品に入れておけば効果を発揮 要求レベル: 100 10% 攻撃スピード強化 10% より速い呪文詠唱 (21 to 150)% のボーナス攻撃値 ライフを徐々に回復 +(11 to 40)
ロードオブプリムスはさらに、デストラクション難易度において2%の確率でトロフィーを落とします。
ちょっとしたボーナスのために、チャームとトロフィーをキューブで合成してください。
6/7 虚栄の大聖堂 [難易度:EXTREME]
場所:地下通路 レベル2 (岩の原or暗き森から)
'How much suffering, mortal, does it take before you lose your grace?'
According to pagan myth, the mortal plane ? Sanctuary ? was created by the fallen angel Inarius and the demon Lilith to serve as a refuge from the Eternal War. The two created a race of servants from the earth which were to worship them for all eternity.
Humanity broke free when a small group of farmers rediscovered their birthright and ancient powers inherited from their supernatural parents. As the edyrem army grew, Inarius descended into megalomanic madness and was eventually destroyed along with his golden cathedral of vanity.
It is whispered that the ghosts of Inarius and his closest worshippers still roam the cathedral…
戦略
The Crystal Ball is the last of the cathedral’s magical defences. The tower grants a holy invulnerability shield to nearby worshippers and casts a searing beam of Heavenly light that destroys anything it touches. Destroy the Crystal Ball to dispel the immortality from the other enemies.
Now nothing more than overgrown ruins, Toraja once stood proud as a medium-sized city in ancient times, and has become legendary as the city where the nephalem Uldyssian recruited most of his edyrem to spearhead the uprising against the infernal Cult of the Triune and Inarius’ Cathedral of Light.
This is where the time portal leads you. Aid the edyrem in their battle against Lilith and the Triune’s minions.
戦略
このレベルでは、Celebrant・アーチャー と モール・ファイターを傷つけることが出来ません そしてあたなたが出来ることもないでしょう。
しかしながら、サモンユーバークエストの『審判の日』を解決しているならば、エディレムを呼び出す能力を与えられます。
エディレムは敵の無効を剥ぐことができるファイターメイジです。
Although they are vulnerable to the supernatural onslaught of the Triune, they have the power to cast an invulnerability shield of their own, allowing them to close in and remove the immunities.
Vizjun, the technological home city of the Viz-Jaq'Taar or Assassins, has recently run into a major system flaw. The artificial intelligence, Master Control System seems to have developed sentience as Diablo approached; the computer then constructed a large army of robots to take over the city, its missile silos and from there the world.
The MCS managed to turn the city's cybernetic defences against its inhabitants. Those seeking to retake the compound will have to contend with its arsenal of combat drones, minefields and electro-pulse generators. It is said that the MCS slumbered and fulfilled its menial tasks for years until the Viz-Jaq'Taari scientists had developed 'The Bomb', a secret weapon capable of destroying entire nations...
戦略
Basic strategy is not too difficult: there are melee robots, laser robots and machine-bolter robots. You should know what to do by now.
But beware, Big Brother is watching you. The area's automatic defences will periodically deploy additional drones, chaingun sentries, minefields and various explosives when you enter the protected zone. The computer voice warns you of what is about to happen.
The level boss, MCS is invulnerable to any damage. To destroy it, use the handy Purify skill you acquired in Duncraig. A few shots should be enough.
所持品に入れておけば効果を発揮 要求レベル: 100 10%の確率でレベル10 Time Strike投射(命中時) 100%の確率でレベル59 Blast Wave投射(自分が死亡した際) +(11 to 25) 筋力上昇 +(11 to 25) 敏捷性上昇 +(11 to 25) バイタリティ上昇 +(11 to 25) エネルギー上昇