STRIKE ONLY ONE KEY AT A TIME AND LIFT THE FINGER INSTANTLY. as in the staccato movement.
Do not press the keys ; strike them with a light, sharp blow as in the staccato movement. STRIKE ONLY ONE KEY AT A TIME AND LIFT THE FINGER INSTANTLY. A second key must never be struck until the finger Is lifted from the first key. Strike regularly, in even time and with equal force, so that the printed letters may be equally dark.
If two keys are struck at the same time, the type bars may be bent, out of alignment
Be careful to strike the keys with a light springing blow. Do not hold the finger down, but lift it immediately after striking a key. If two keys are struck at the same time, the type will clash and the type bars may be bent, throwing the letters out of alignment; that is, causing them to be printed out of their proper place.
If a second letter is struck before the first key has been fairly released, the printed letters will be too close to each other. Move the fingers with a steady up and down movement as when playing notes of equal length on the piano. Make a special effort when striking keys with the weaker fingers, so that the printed letters may be equally distinct. Do not be troubled if the third finger seems stiff and weak at first; practice will strengthen and limber it. Besides the typewriting drill, bending it back and forth occasionally will render it more pliable. Bathing the finger joints with vaseline or glycerine tends to make them more fiexible.
If the finger key tension is too weak, the keys will not spring up as they should when released, and one letter will fall upon another.
MECHANISM OF THE REMINGTON. xvii
26. Finger Key Tension. The coiled spring attached to the rocker below the dogs is the finger key tension spring. If the finger key tension is too strong, the keys will strike hard, the machine will shake, and the letters will be more or less out of alignment. If too weak, the keys will not spring up as they should when released, and one letter will fall upon another. It is very important that the finger key tension should not be meddled with, as it is all right when the machine leaves the factory, and if let alone will need no adjustment in a long time. If necessary, however, regulate the tension by the large thumb screw at the left of the spring, turning the screw to the right to increase, or to the left to decrease the tension.
Notice just how much you turn the screw, then if you find that the trouble is not with the tension, you can turn the screw back to where it was before, Remember the machine will not work well unless the carriage tension and the finger key tension correspond. They must be equally weak or equally strong. Very rapid operators need a stronger tension than others.
WHAT IS THE MATTER WITH MY MACHINE?"
If only certain letters are out of alignment, the type bars may be bent or slightly sprung out of place.
39. Alignment. One great cause of the lack of alignment in typewriters is that they are not kept properly cleaned and oiled. If the front rod is not oiled every day, the yokes • that rest on this rod will wear loose, allowing the carriage to shake and throwing the letters out of alignment. Loosen the front screw in the yoke, put a single thickness of paper between the yoke and the rod, then pinch the front and the back blocks of the yoke closo to the rod and fasten the screw securely. The paper will prevent the yokes pressing the rods
XX HOW TO BECOME EXPERT IN TYPEWRITING.
too closely. Should it become neceesary to renew the yoke blocks, remove the outer ones first, put on the new ones and move them up against the rod, screwing them on so that the rod is held firm. Then put on the back ones and set them agaii^t the rod,interposing a piece of paper to prevent getting them too close. These screws should be turned in firmly to prevent jarring loose.
If only certain letters are out of alignment, the type bars may be bent or slightly sprung out of place. Set the shifter for capitals. Test the letter to be aligned by writing it alternately with N, thus : NANANA, NBNBNB, etc. If A is out of alignment, it will appear
A A \
higher or lower than N, N N N'orN^N^N*; too far to the right or too far to the left, N AN AN A, or NA NA NA. Lift the carriage, depress the key, grasp the type bar lightly with the left hand, loosen the large screw in the hanger a very little so that a slight pressure upon the type bar will move it in any direction. ' If the letter prints too high, move the type bar slightly from you ; but if the letter prints too low, draw the type bar towards you. Move the type bar to the right or to the left as may be required. Tighten the screw and test the alignment. Hold down the space key and strike N. Raise the space key, then depress it and strike the other capital. If the letter is still out of alignment, loosen the screw and try again. It will probably be necessary to make several attempts before succeeding, as a very slight pressure on the type bar will move the type further than expected.
When the letter seems to be in a line with N, hold the space key down and print N and then the letter to be aligned. If the letter falls directly over the N, make the large screws very tight and repeat the test. If the letter again falls directly over the N, the alignment is perfect. Remember all letters are aligned to N. Remember to tighten the screw in the hangt^r each time before testing; and, after the letter is properly aligned, make the screw so firm that the type bar cannot spring out of place again.
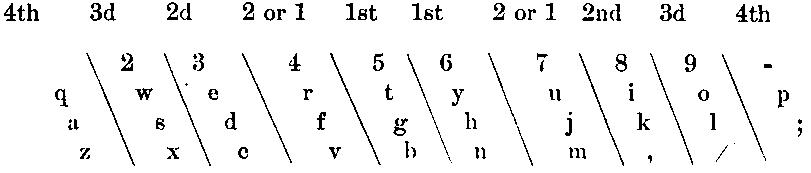
Four finger method
Remember to use small l for the figure one, and capital O for zero.
If a type bar sticks or does not move freely,
24. Monthly Cleaning and Oiling. It is well to select a certain day in the month, as the 1st or the loth, and on that day give the machine a special cleaning and oiling. Use a clean, small paint brush to remove the dirt from the hangers and other intricate parts of the machine. If a type bar sticks or does not move freely, brush the hinge with a clean brush wet with benzine, then with a darning needle or a broom straw apply a very little oil on either side of the hinge. Work the type bar up and down until the oil has reached every part of the hinge, then wipe off all of the oil with a clean cloth, or the type bar will soon stick worse than before. Remove the screws from the back wheels or rolls, clean the screws and the screw holes with an oily cloth, then replace the screws, each to its own place, and tighten firmly.
Oil the bearings of the upper pulleys, the hook bearings of the feed-roll, the bearings of the grooved shaft and also the shaft which carries the spools. Whenever the bearings of any of the wheels require it, or wherever there is a squeak, oil may be applied, provided all surplus oil is afterward carefully removed. The machine 'will sometimes move stiffly in shifting from lower to upper case. A drop of oil on each side between the carriage frame and the slide will usually remove the difficulty. Now and then the shaft in front of the basket, to which the shifter is attached, should be oiled at the points where it is supported in the frame. Clean, oil and wipe the bearings of the rocker underneath the dogs. Examine the rocker pivots to see that they do notjH||||M|8 and allow the spacing rocker to move side-ways. Occasionally oil the loose dog pin, as it sometimes gets dry, causing the dog to move sluggishly. If necessary, wash out the dirt at the base of the loose dog with benzine or oil. A mixture of two parts oil and one part benzine is excellent for cleaning. Use benzine only and a perfectly clean brush when cleaning the rack or the hangers. If any of the nickel-plated parts show signs of rust, keep them wet with oil for a few hours and then wipe off. Or, remove the rust with powdered pumice and then apply oil.
&link_trackback() counter -
最終更新:2010年02月16日 08:22